

 English
 Français
 Español
See Details
- Residential Energy Storage

- C&I BESS

- Large-Scale Centralized Energy storage

- Solar Panel

- Power Inverters

- Vehicle Lithium Battery


Industry News
Home / News / Industry News / How to Choose Between Roof Mount and Ground Mount Solar Racking Systems
How to Choose Between Roof Mount and Ground Mount Solar Racking Systems
Content
- 1 Roof Load Limits and Ground Clearance Change the Mounting Math Entirely
- 2 The Core Trade-Off: Roof Mount Versus Ground Mount
- 3 Wind Load and Structural Integrity Come First, Not Last
- 4 Racking Components Shared Across Roof and Ground Systems
- 5 Tilt Angle Optimization: Fixed Roof Pitch Versus Adjustable Ground Racks
- 6 Installation Workflow for Ground Mount Racking Systems
- 7 Flashing and Waterproofing for Solar Panel Roof Mounts
- 8 Modular Racking for Commercial BESS Integration
- 9 Rack-Mount Installation Best Practices
- 10 Evaluating a Custom Solar Energy Equipment Supplier
- 11 Long-Term Inspection Schedule for Roof and Ground Racking
- 12 Frequently Asked Questions
- 12.0.1 Q1: What is the main structural difference between roof and ground mount racking?
- 12.0.2 Q2: How deep should ground mount posts be embedded?
- 12.0.3 Q3: Can the same solar racking kit be used for both roof and ground applications?
- 12.0.4 Q4: Does a steeper tilt angle always produce more energy?
- 12.0.5 Q5: Why does waterproofing fail on some roof mount installations?

Roof Load Limits and Ground Clearance Change the Mounting Math Entirely
Every solar installation eventually forces the same decision: does the array sit on the roof, or does it sit on the ground. The answer rarely comes down to preference. It comes down to structural capacity, soil conditions, shading geometry, and how much the racking hardware itself will cost to fabricate and ship. A solar panel array performs identically on paper regardless of mount type, but the racking system underneath determines whether that performance is realized over twenty-plus years of wind cycles, thermal expansion, and fastener fatigue.
This guide breaks down the engineering and procurement differences between solar panel roof mounts and ground mounts for solar panels, with practical detail on wind load calculations, tilt angle strategy, waterproofing, and how commercial buyers evaluate a solar racking kit before committing to a production order.
The decision also has downstream consequences that are easy to underestimate at the design stage. A roof mount system locks the array orientation to whatever the building geometry allows, which can leave production on the table if the roof faces away from true south or is broken into multiple small planes by HVAC equipment, skylights, or parapet walls. A ground mount system avoids that constraint entirely but introduces new variables: property setbacks, drainage patterns across the site, and access roads for maintenance vehicles all need to be resolved before the first post goes into the ground. Neither path is inherently cheaper or simpler; the right choice depends on which set of constraints the specific site actually presents.
Racking failures are rarely caused by panel defects. Post-storm inspection data from utility-scale sites consistently points to under-torqued fasteners, corroded rail splices, and undersized ground screws as the leading root causes of array displacement.
The Core Trade-Off: Roof Mount Versus Ground Mount
Roof mounting uses the existing building structure as the foundation, which eliminates excavation and concrete work but transfers every wind and snow load directly into the roof deck and rafters. Ground mounting builds an independent structure from driven piles, helical screws, or ballasted footings, which adds material cost but removes any dependency on roof condition or orientation.
When Roof Mounts Make Sense
- Available roof area already faces a favorable azimuth, avoiding the cost of a separate structure
- Land is limited or reserved for other use, common in dense commercial and industrial parks
- The roof structure has verified remaining load capacity confirmed by a structural engineer
- Permitting timelines favor rooftop systems in the local jurisdiction
When Ground Mounts Make Sense
- Roof age, material, or slope makes long-term penetration risk unacceptable
- Open land is available and the site benefits from optimal tilt and orientation independent of any building
- Maintenance access needs to be simple, without rooftop safety equipment or fall protection
- The project pairs with ground-level battery energy storage and needs shared foundation planning
Cost and Timeline Considerations
Roof mount projects generally move faster through permitting because the building footprint is already approved, and the racking itself uses less raw material per kilowatt since the roof structure does most of the structural work. Ground mount projects typically carry a higher upfront racking and civil cost per kilowatt, driven by foundation work, but that cost is often offset over the life of the system by easier module cleaning, simpler thermal performance due to open-air airflow beneath the array, and lower long-term maintenance labor since technicians are not working at height.
Wind Load and Structural Integrity Come First, Not Last
Wind load and structural integrity should shape the racking selection before tilt angle or aesthetics enter the conversation. A rooftop array in a 120 mph exposure zone generates uplift forces that concentrate at panel corners and rail end clamps, which is why corner clamping hardware typically carries a different torque spec than mid-rail clamps in a properly engineered solar racking kit.
Ground mount racking faces a different load path. Instead of uplift transferring into roof fasteners, it transfers into the foundation through bending moment at the post-to-footing connection. Driven post embedment depth, not post size alone, is usually the deciding factor in whether a ground mount racking system survives a design wind event. Soil bearing capacity reports, not assumptions, should dictate embedment depth on any project over a few kilowatts.
Wind load calculations for either mount type typically start with the site's basic wind speed rating from the applicable building code map, then apply exposure category adjustments for terrain roughness and building height. A rooftop array on a tall structure in an open exposure category will see meaningfully higher design pressures than the same array at ground level, which is one reason racking rated for one application cannot simply be reused on another without re-checking the load case. Ground mount arrays add a second variable that roof arrays do not face: frost heave in cold climates can gradually lift shallow foundations over repeated freeze-thaw cycles, which is why embedment depth in northern regions is often driven by frost line depth rather than wind load alone.
| Load Factor | Roof Mount Impact | Ground Mount Impact |
|---|---|---|
| Wind Uplift | Transfers into deck and rafters via clamps | Transfers into foundation via post moment |
| Snow Load | Adds to existing roof dead load limit | Independent of roof, sized separately |
| Seismic Movement | Constrained by roof structure flexibility | Isolated from building movement |
| Thermal Expansion | Rail expansion joints required over long runs | Rail expansion joints required, larger spans typical |
Despite different foundations, most solar racking kit hardware overlaps between roof and ground applications. Rails, mid clamps, end clamps, splice bars, and grounding lugs are frequently the same part numbers across both mounting types, which simplifies inventory for installers who handle both residential rooftop and commercial ground mount projects in the same service territory.
Material choice for these shared components deserves the same attention as the foundation design. Rail and clamp hardware is typically extruded or roll-formed aluminum for weight savings, paired with stainless steel fasteners to avoid galvanic corrosion at the contact point between dissimilar metals. Mild steel components, where used for posts or ground screws, are almost always hot-dip galvanized rather than painted, since a painted coating chips during driving or installation and exposes bare steel to moisture within the first year of service.
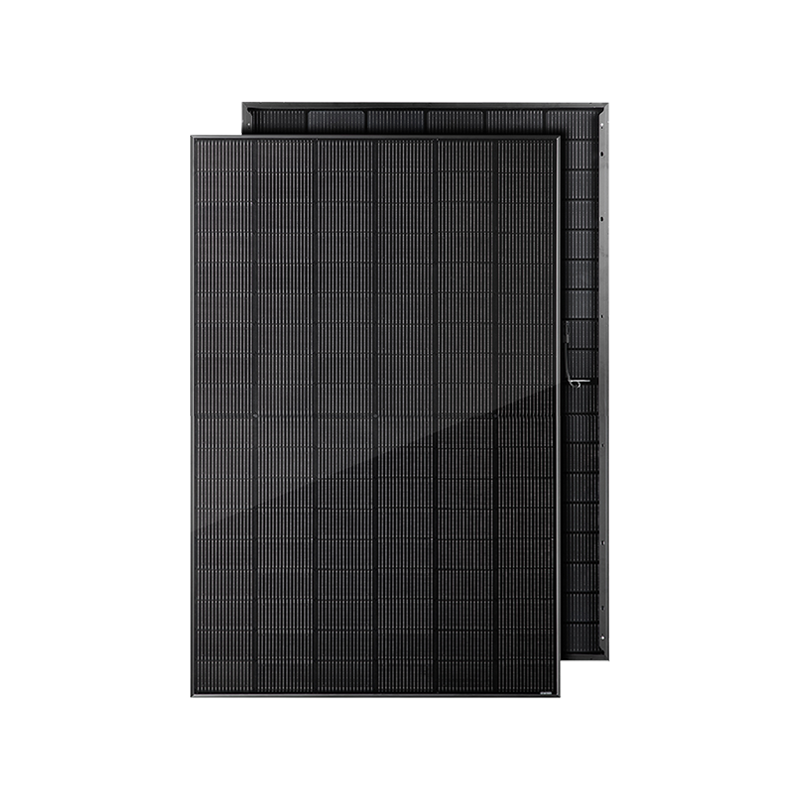
Rail SpanUp to 6m between supports
Clamp TorqueManufacturer spec, typically 10-20 Nm
GroundingContinuous bonding path required
Tilt Angle Optimization: Fixed Roof Pitch Versus Adjustable Ground Racks
Tilt angle optimization is where ground mounts hold a structural advantage. A rooftop array is constrained by the existing roof pitch unless tilt-up legs are added, which increases wind exposure and racking cost. Ground mount kits, by contrast, are typically installed at a fixed optimal tilt calculated for the site latitude, and some commercial systems support seasonal tilt adjustment for an additional yield gain.
Practical Tilt Guidance
- Start with a tilt angle close to the site latitude for balanced annual production
- Reduce tilt slightly if summer generation is prioritized over winter output
- Increase tilt slightly in snow-prone regions to encourage natural shedding
- Verify row spacing accounts for shading at the lowest sun angle of the year
Low-slope commercial roofs often use a compromise tilt between 5 and 15 degrees specifically to reduce wind sail area, accepting a small production trade-off in exchange for a lighter, lower-cost racking structure.
Row spacing works together with tilt to determine actual usable output rather than theoretical output. Two identical ground mount kits installed at the same tilt but different row spacing can produce noticeably different annual yields once winter shading between rows is accounted for, since a shadow cast at a low sun angle can fall across a meaningful portion of the row behind it. A common approach is to size row spacing so that the array casts no shadow on the neighboring row at solar noon on the shortest day of the year, though projects with tighter land constraints sometimes accept a small winter shading loss in exchange for higher density per acre.
Installation Workflow for Ground Mount Racking Systems
Ground mount installation follows a more linear sequence than rooftop work because each stage depends on the foundation completed before it. The diagram below outlines the typical sequence used on a mid-size ground mount kits deployment.
Flashing and Waterproofing for Solar Panel Roof Mounts
Every roof penetration is a future leak path unless flashing and waterproofing for solar mounts is handled to the same standard as the roof membrane itself. A common shortcut, sealant applied directly over an unflashed lag bolt, will typically fail years before the racking warranty expires because sealant degrades under UV exposure while a properly integrated flashing stays protected under the roofing material.
| Roof Type | Recommended Attachment | Waterproofing Method |
|---|---|---|
| Composition Shingle | Lag bolt into rafter | Flashing under shingle course above |
| Standing Seam Metal | Seam clamp, no penetration | None required, clamp-based |
| Membrane/Flat Roof | Ballasted or minimal penetration | Boot flashing with membrane-compatible sealant |
| Tile Roof | Tile hook or replacement tile mount | Underlayment flashing beneath tile |
Standing seam metal roofs deserve particular attention in procurement discussions because a clamp-based, zero-penetration attachment removes flashing entirely from the maintenance conversation, often shortening install time on large commercial roofs.
On penetrating attachments, the order of operations matters as much as the flashing material itself. Flashing installed after the roofing membrane, rather than integrated beneath the course above the penetration, is one of the most common causes of early leak claims on rooftop solar projects. A properly sequenced install places the flashing so that water always sheds over the top of it rather than behind it, following the same shingle-lap logic used for any other roof penetration such as a vent stack or skylight curb.
Modular Racking for Commercial BESS Integration
Sites pairing solar with battery energy storage increasingly specify modular racking for commercial BESS enclosures alongside the array foundation. Sharing a foundation plan between the solar ground mount racking and the battery enclosure pad reduces civil work duplication and keeps conduit runs shorter, which lowers voltage drop across DC combiner circuits.
- Coordinate foundation design early so BESS pad loading and array post spacing do not conflict
- Route conduit trenches during the same excavation pass as post foundations
- Confirm fire setback distances between the array edge and battery enclosure per local code
- Plan for future capacity by sizing conduit and combiner space beyond the initial array
The physical racking connection between a solar ground mount racking system and a battery enclosure is usually limited to shared trenching and grounding grids rather than a direct structural tie, since the two structures typically carry very different load profiles and are designed to independent specifications. Even so, treating the array and the storage system as one coordinated civil project, rather than two separate contracts awarded to different crews, tends to reduce rework caused by conflicting trench routes or grading changes discovered mid-installation.
Rack-Mount Installation Best Practices
Rack-mount installation best practices reduce warranty claims more than any single component choice. Torque values matter as much as the hardware grade specified on the drawing.
Torque Verification Bonding Continuity Test Post Plumb Check Rail Expansion Gap Fastener Corrosion Rating
- Verify post plumb before rail installation, not after modules are already mounted
- Torque every clamp to the specified value and spot check with a calibrated wrench
- Leave the rail expansion gap specified for the site temperature range at install time
- Test grounding continuity across every rail splice before energizing the array
- Document fastener lot and coating type for future corrosion inspection reference
Crews that rotate between roof and ground projects benefit from a written checklist rather than relying on memory, since the torque values, gap tolerances, and grounding requirements between the two mount types are similar enough to cause confusion but different enough to matter. A short pre-energization sign-off, checked against the racking manufacturer's installation manual rather than general industry habit, catches the majority of preventable warranty claims before the array is ever connected to the grid.
Evaluating a Custom Solar Energy Equipment Supplier
Procurement teams comparing racking vendors should look past unit price alone. A custom solar energy equipment supplier capable of adjusting rail length, post embedment depth, and clamp configuration to site-specific wind and snow data will typically prevent costly field modifications later. This matters most on projects sourcing panels through pv module wholesale channels, where module dimensions and frame thickness can vary between production batches and must match the racking tolerance exactly.
Racking drawings should reference the actual module frame dimension on order, not a generic industry average, since a two millimeter frame difference across thousands of clamps compounds into real installation delay.
Procurement documentation should also specify coating and fastener standards explicitly rather than leaving them to a generic quote line, since two racking quotes that look identical on price can carry very different corrosion warranties depending on whether the steel components are hot-dip galvanized to a recognized coating thickness standard or simply electro-plated. Buyers evaluating multiple quotes for the same project scope should request the coating specification and fastener grade in writing before comparing pricing, since the cheapest quote on paper is sometimes the most expensive outcome once early corrosion replacement is factored into the total project cost.
Long-Term Inspection Schedule for Roof and Ground Racking
Racking hardware is often treated as a one-time install item, but both roof and ground systems benefit from a scheduled inspection cadence rather than a reactive response to visible damage. The table below outlines a practical inspection interval used across many commercial maintenance contracts.
| Inspection Item | Roof Mount Interval | Ground Mount Interval |
|---|---|---|
| Fastener Torque Spot Check | Annual | Annual |
| Flashing and Sealant Condition | Annual, post-storm as needed | Not applicable |
| Post or Footing Movement | Not applicable | Annual, after major frost events |
| Grounding Continuity Test | Every two to three years | Every two to three years |
| Corrosion Visual Inspection | Every two years | Annual, coastal or high-humidity sites |
Coastal and high-humidity sites warrant tighter inspection intervals regardless of mount type, since salt-laden air accelerates fastener and rail corrosion well beyond the rate seen in dry inland climates. Maintenance contracts that ignore this distinction often underestimate the labor needed for a coastal ground mount racking installation compared with an identical system built further inland.
Frequently Asked Questions
Q1: What is the main structural difference between roof and ground mount racking?
Roof mounts transfer wind and snow loads into the existing building structure through clamps and penetrations, while ground mounts carry the same loads into an independent foundation such as driven posts or ballasted footings, isolating the array from the building entirely.
Q2: How deep should ground mount posts be embedded?
Embedment depth depends on soil bearing capacity, local frost line, and design wind speed rather than a single fixed number, so a geotechnical assessment or local soil report should guide the final depth on any commercial-scale project.
Q3: Can the same solar racking kit be used for both roof and ground applications?
Rail, clamp, and grounding components often overlap between roof and ground systems, but the foundation hardware, whether lag bolts and flashing or posts and footings, is application specific and cannot be interchanged.
Q4: Does a steeper tilt angle always produce more energy?
Not necessarily. A steeper tilt can favor winter production and snow shedding but may reduce summer output and increase wind load, so the optimal angle balances annual yield against structural and site-specific factors.
Q5: Why does waterproofing fail on some roof mount installations?
Failures typically trace back to sealant used as the sole waterproofing method instead of proper flashing integrated with the roofing material, since exposed sealant degrades under UV exposure well before the racking system's expected service life.
Related products
News
-
Your commercial electricity bill may look like it is driven by total kWh, but an increasing portion is determined by how fast you use that ...
READ MORE -
A textile plant in Yangon keeps sensitive production lines running through unstable grid supply. A warehouse in Singapore uses battery stor...
READ MORE -
Honle New Energy Technology Participates in Industry Exhibition From September 8 to 10, 2026, Honle New Energy Technology Co., Ltd. partic...
READ MORE -
You have mounted solar panels, wired a battery bank, and installed an inverter. Yet your batteries never seem to reach full charge, or they...
READ MORE -
You have just received a higher electricity bill, and the sun is still shining outside. Can you actually use that free energy? Yes, but no...
READ MORE

PRODUCTS
LINKS
CONTACT
- Landline: +86-021-56981116
- TEL: +86-13795289200
- Email: [email protected]
- Address: 301-09, Building 6, Zhangjiang Microelectronics Port, No.690 Bibo Road, Pudong District, Shanghai
Copyright © Honle New Energy Technology Co., Ltd.
All Rights Reserved.
Wholesale Solar Energy Equipment Suppliers

This site uses cookies. By continuing to browse the site you are agreeing to our use of cookies. For more details about cookies and how to manage them see our 《Privacy Policy》
Accept